Wednesday, November 30, 2011

Countdown Calendar


Here's a fun way to countdown to Christmas
or any other holiday.
You could do the same thing for Valentine's Day,
an upcoming birthday or the start of summer vacation.
We start our countdown on December 1st,
but you could use the 12 days of Christmas
if you haven't got time to get this done before then.


Cut out pictures from magazines or old greeting cards
based on the theme.
Here is a combination of Lil' Guy's favorite things
and Christmas symbols.


Doors, gates and windows will open
to reveal a different picture for each day.


Glue your pictures onto a piece of colored cardstock.
You'll need two sheets of the same size,
one for the top, one for the bottom.
These are 12" X 12" sheets.
I chose blue and white.


Using a craft knife,
cut around the doors, windows and gates
to open in various ways.


Inside each cutout, glue a themed picture
onto a piece of contrasting colored paper.
I just line up my top page (blue) with the bottom (white),
and adhere each themed picture inside of it.
Then glue the sides together.

Each day will bring a new surprise.


Remember to number each opening.
Feel free to decorate or add fancier paper.
This is what I had time to do for my lil' one.

The countdown is on!


Our Simple Homestead Blog Hop


Repurpose My Life

Monday, November 28, 2011

Gluten-free Holiday Cookies

  Gluten-free snickerdoodle cookies are easy to turn
into holiday treats.
All you need are the right cookie cutters!


Add a little snow (powdered sugar)
for that wintry effect!

Linking up with:


Friday, November 25, 2011

Homemade Apple Pie

Our Thanksgiving feast was topped off
with a homemade apple pie.
What could be more American on this special holiday?


Granny Smith apples are a fine choice for an apple pie.


Peel and slice the apples right before adding to pie
so that they won't discolor.


Mix the pads of butter with the flour.
Hands are the best tools for this job.


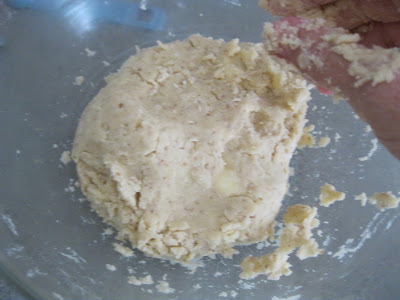
Dough comes together after some blending.


Use fork to poke holes in crust before baking.


Combine dry ingredients with apples and toss.


Add pads of butter to top of pie.
I add remaining dough in bits to the top
rather than forming another crust layer.
Gives it a unique look.


Homemade Apple Pie

Crust:
2 C flour
1/2 C cold butter (unsalted)
1/2 C ice water
1/2 t salt

Filling:
8 Granny Smith apples, sliced
1 C sugar (or sucanat)
1 T flour
1 1/2 t cinnamon
2 T butter (unsalted)

Prepare crust by blending butter into flour and salt.
Add water as needed to create the desired texture.
Roll out with rolling pin or
free-form fit it into your pie dish.
Poke holes in crust and bake at 375 for 20 minutes
or until a light golden color.

Place sliced apples into large bowl
and add dry ingredients.  Mix well.

Pour apple mixture into cooked pie shell.
Add dots of butter to top.
Add remaining pie dough on top,
making sure to leave slits or spaces to vent.

Bake at 425 degrees 20-30 minutes
or until apples are tender and
crust is golden brown.
Enjoy!


The Self Sufficient HomeAcre


Logo-Logo_25
Motivation Monday Linky Party Sunday 6:30 pm at www.alifeinbalance.net


Thursday, November 24, 2011

I'm Thankful For...


My senses that let me experience...


all of God's magical creations.


Peace in the garden.


The seasons and the gifts each one brings.


Being able to provide for critters.


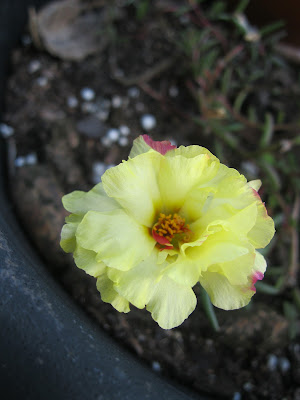
A warm blanket of flowers.


Delicate blooms noticed through being present.

Have a wonderful holiday, y'all!
Sending you peace and abundance
on this very special day.
Thanks for visiting!

motivation-monday-6 hosts


Wednesday, November 23, 2011

Essential Oils

Thanks to Marisa over at Backyard Farming,
I've become interested in exploring essential oils
beyond my past household uses.
I wasn't aware that they could be incorporated
into a wellness regime.
Anything that is noninvasive and doesn't carry
the side effects of conventional medicine
is worth investigating.

She hosted a webinar on some basics,
which peaked my interest.  I need to learn more.
As part of the course,
 a kit was supplied which contained 10 essential oils.
These included peppermint, melaluca, lemon, frankincense,
oregano and lavender.  The kit was also composed of
a few blends for various ailments.
They consisted of treatments for headaches,
respiratory issues, digestion and sleep troubles.
I'd love to incorporate this practice
into our homeopathic approach to wellness.
Looking forward to the next webinar
over at Backyard Farming.


Our library has a couple of books on the subject,
but I'd really love to see a video.
 Learning by doing works best for me, 
but maybe seeing someone else doing
what I want to learn
would be almost as helpful.

I'll keep ya posted!
Be well...

For more information on using essential oils,
read this.


Tuesday, November 22, 2011

Hold That Thought!


This is an example of the power of thought.
We've had a picture of this red Ranger
on our vision board for about a year.
Lil' Guy also had one posted on the wall in his room.

We've looked on and off (mostly off)
for one over the past year.
We knew at the price of between $650-$800,
we couldn't afford to buy a new one.
We even found one in the Carolinas
that we were pulling all kinds of strings to obtain,
only to find out that it had been sold a few days earlier.
We basically put it on the back burner.


Until the week before Lil' Guy's birthday.
Big K was doing an overall search through
the whole of Craigs' List and one came up.


It was red.
It was still available.
It was 30 minutes away.
The price was unbelievable.


This week the parts should come in
so that the boys can work on it.
Big K had already refurbished a jeep and a fire truck,
making them look like new with some paint and a few tweaks.
As Lil' Guy grows, so do his toys.

The money that I had put away little by little for a new ride-on
was exactly what we paid for this beauty.

The kicker?
The money we got for selling his Gator
will cover all the expenses for the new parts.

It pays to keep a good thought.
Life is good...


Monday, November 21, 2011

Giving Thanks at the Table

We're linking up with Kim over at Newly Woodwards
for her Thanksgiving Dare-to-DIY Party.

This is a tradition we do every Thanksgiving.
Our table covering consists of a simple sheet of butcher paper
and enough paints, pens and markers for guests to use.
Each year the table is decorated
and everyone writes what they are grateful for
from the past year.


Here's one from a few years ago.

Hop on over to Kim's and see some great ideas
for beautiful tablescapes!

Dare to DIY Blog Party


Saturday, November 19, 2011

Plain Talk

We started purchasing Plainville ground turkey
at our local grocery store.
I don't cook red meat, so the boys eat a lot of
ground chicken and turkey (and some fish).
I wanted to find out more.
Check it out.

http://plainvillefarms.com/

I'm not one to advertise (especially on this blog),
but I'm feelin' pretty good about this company.
It's the only humanely-raised turkey around these parts.
I especially like the family with 9 children featured
in the "Meet the Farmer" section
and what the dad has to say about their way of life.
Makes me want to keep supporting what they're doing.


Friday, November 18, 2011

Homemade Dishwasher Detergent

This is something I've been wanting to do for a while.
We are working toward becoming more self-sufficient
with household products.

Here's a recipe I found for dishwasher detergent.
With a few simple ingredients
and about 10 minutes worth of your time,
you can be sure that you will be on your way
to providing your homestead with another product
that will be superior to anything you can find in the market.
Just as it's important to know what goes into our bodies,
 knowing what's in the cleansers we use is another way
to assure that our family is exposed
to the safest ingredients possible.


The citric acid was found at the health food store.
Although the recipe calls for lemon oil,
I used cucumber/melon,
as that's what was in the medicine cabinet.


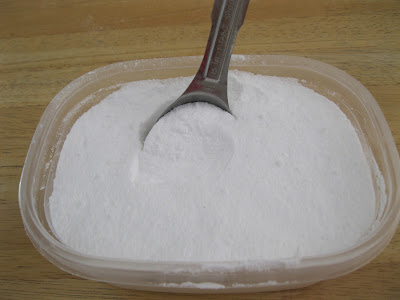
All ingredients except the essential oils are measured
and added to a blender or food processor.
Once the mixture is processed,
add your favorite oil (or not!).


A fine texture is your goal. 
I added a tablespoon right in the container.


Since this is the first time I'm making this,
the date will help me know how long it lasts
before another batch is needed.
I also marked the label with "1 T",
so the person starting the load
will know how much is needed per load.


Dishwashing Detergent
1 C Borax
1 C baking soda
1/4 C sea salt
1/4 C citric acid
30 drops lemon essential oil

Pulverize all but oil in blender in small batches.
Add oil when mixture is a fine texture.
Add 1 T (tablespoon) per load.
Enjoy!

***Update:  This cleanser did not meet our expectations,
so we tweaked it.
Find the new recipe here.


Thursday, November 17, 2011

Dare to be Thankful

We are participting in the Dare To Do It Yourself Party
over at Newly Woodwards.
Thanksgiving is hands-down my favorite holiday.
The crisp autumn air, the spirit of the holidays wafting,
the mashed potatoes with vegetarian gravy.
Let's face it,
it doesn't get much better than that!


I made this wreath out of a paper plate
and die-cut leaves fastened with everyday glue.
Those scrapbooking tools are getting some use!


One tradition we have is that every year
we take a picture of Lil' Guy with this Tommy Turkey
he made when he was a lil' sprout.
It's fun to see how he's grown each year.
You could do the same with grandkids, pets or your garden.


These are our dried apple guys.
They look like a barbershop triplet.
We made these the first year we started homeschooling,
and they sit on our shelf still.
Kinda weird, but,
we usually go for the unconventional.


Thanks Kim, for hosting such a great blog party!


Dare to DIY Blog Party