Showing posts with label personal care. Show all posts

Thursday, September 6, 2018

Foaming Soap for Skin Relief


 We recently purchased some foaming dispensers
so that I can get some relief for my dermatitis.
My doctor recommended that I do away with any toiletries
that contain SLS, including soap, shampoo, and toothpaste.
Dr. Bronner's is a "safe" soap for my skin
and is now being used exclusively for all of our washing needs.
Shown here is the peppermint fragrance,
but there are other scents, as well as an unscented option.
Aside from being a safe product, 
It feels great to support a company with a conscience.


For each dispenser,
1/2 C of distilled water was added,
followed by 1/4 C of castille soap.
It's important to add the water first,
so that the suds don't fill up the space.
At this point, essential oils can be added,
thereby creating custom soap bouquets!
Since I used the peppermint scented soap,
no additional essential oil was added.


This recipe comes together in minutes.
Being able to add whatever scent floats your boat
adds to its appeal.
Dr. Bronner's is a concentrated solution,
so by diluting it in this way,
we end up saving money on a really fine product.

The third dispenser was used for my homemade shampoo,
which you can read about here.

Do you enjoy making your own personal care products?


This Is How We Roll Link Party


Thursday, August 30, 2018

Homemade Shampoo


 After discussing with my amazing physician my dermatitis issues,
she suggested that all SLS (Sodium Lauryl Sulfate) products
be removed from my hygiene routine.
SLSs are foaming agents that can be found
in everything from shampoo to toothpaste to floor cleaners.
Although it hasn't yet been proven that they cause major illness,
folks respond to ingredients differently,
and it's easy enough to "test" your own reaction.
You can read more about SLS-free products here.

In my doc's personal experience, 
eliminating SLS products improved her own bout with the condition.
That meant switching out soaps, lotions,
shampoos and conditioners, even toothpaste.
After looking into some of the options,
many alternatives were more expensive than what I had been using.
The good stuff always costs more.

The no-brainer was switching to Dr. Bronner's for all of our soap needs,
including dishwashing soap.
I had a couple of bottles under the bathroom sink
that I had bought on clearance some time ago,
and put them into service right away.
Searching for some relief
from the discomfort and complications the condition precipitates,
I thought I'd give diy shampoo a go.
It's very satisfying to be able to
create your own personal care products, 
and I couldn't be more pleased with the results.


This was one of a handful of recipes I found here.
It took mere minutes to whip up
with things I already had on hand.
The lather was incredible,
which I wasn't at all expecting.
It is much thinner than conventional shampoo,
but I'm thinking with a bit of tweaking,
I may be able to remedy that.
The bonus is that I can add any one of a number
of my favorite essential oils to the mix,
to customize the shampoo to my liking.
I'm including in this post a leave-in detangler,
for those who have thick or unruly hair (hand raised).
It sure feels good knowing that I will never have to purchase shampoo or conditioner again.
Taking the time to put together a few, simple ingredients
is another way I can nurture my health.
No chemicals, cruelty-free and no extra packaging to discard,
all align with my deepest intentions.
It's a complete win, in my estimation.

Homemade Shampoo

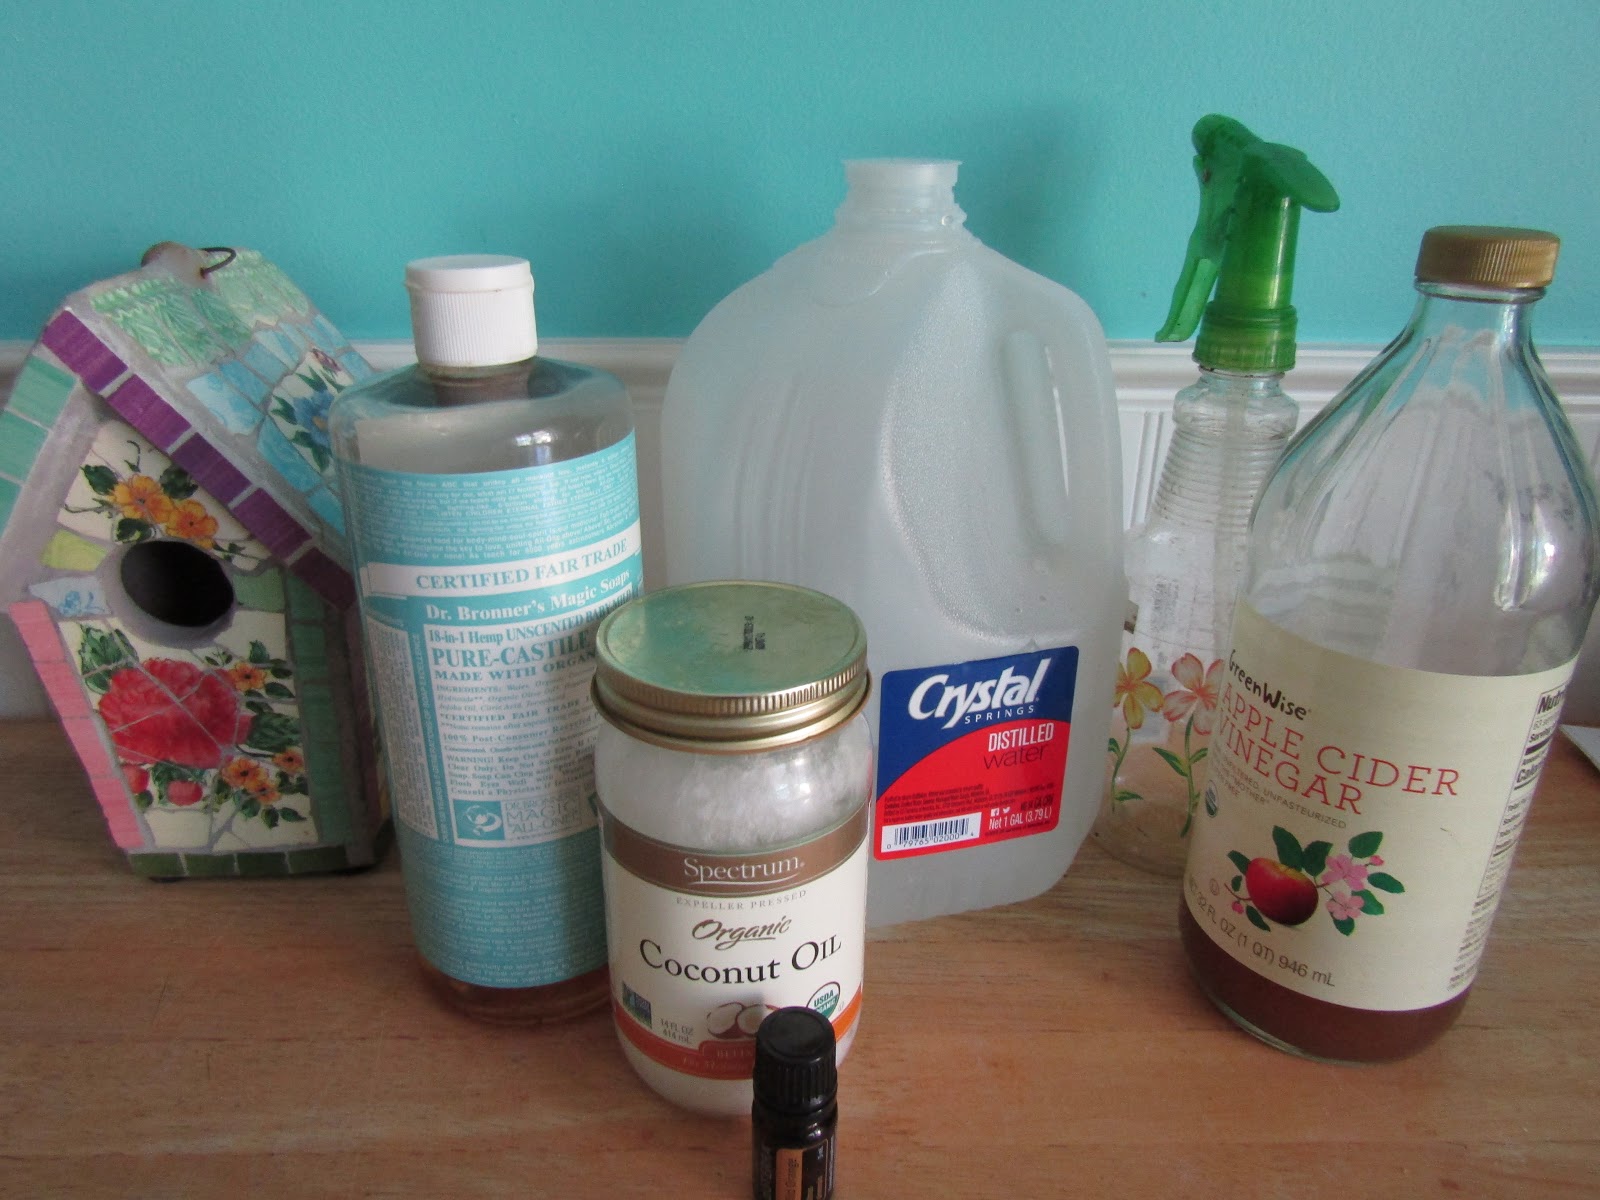
1/4 C distilled water
1/4 C Dr. Bronner's liquid castille soap (I used unscented)
1/2 teaspoon coconut oil (you can use other oils)
5-10 drops essential oil (pick your favorite)

Add ingredients to a bottle or jar and shake well.
Use a handful at a time to wet hair,
(depending on how much hair you have),
and massage into scalp.
Rinse and repeat if necessary.

Homemade Detangler Rinse

1/8 C apple cider vinegar
1/4 C water
Few drops essential oil

Add ingredients to a spray bottle and shake.
Spray on hair before combing out.
This can be done in the shower,
if you want to rinse it out,
but it is not necessary. 

Feel free to double or triple the recipe.
I now only wash my hair a few times a week,
so I can easily make up a batch to last a few washings.
Even if this change doesn't do a thing for my dermatitis,
it fosters my sense of self-reliance.

Are you interested in making more of your own personal products?


This Is How We Roll Link Party


Thursday, February 18, 2016

Thrifty Thursday-Hair Today, Gone Tomorrow


We're all about keepin' it simple around here.
Once in a while, it's fun to shake things up a bit.
Still keeping things simple, but with a twist.


This stuff would never make it into our food pantry.
Along with living simply, we make a concerted effort to scratch cook and eat real,
so Kool-Aid doesn't even make the short list.
I did hear about using it to safely dye hair 
and I thought I'd try it.
Keep in mind that I've never dyed my hair in my life.
Adding chemicals to my skin never appealed to me,
although I know most folks don't give it a thought.
This seemed like a safe way to give it a go.


The method is easy.
Heat the Kool-Aid in water and then place locks in.
My hair had been braided, so it made it easier to maneuver.
After about 10 minutes, 
I removed the braids from the mixture
and let it dry.
Placing the "treated" hair in a shower cap or plastic wrap is helpful,
as well as draping an old towel over your shoulders to keep clothes clean.
Later it was washed in the sink to take some of the Kool-Aid out (it can be sticky).


It turned out much redder than I had thought.
Like,  
CRAZY RED!
I have dark hair, so I wasn't even sure it would take
but it did.  
The surprising thing is, I love it!
It's gone through several washings 
and it still looks pretty bright.
This was a fun experiment
and I will most likely do it again.
It's safe, easy and thrifty!
Hmmm...what shade should I try next?


FGF Logo


Thursday, November 19, 2015

Thrifty Thursday-Best Hair Rinse


I've been blessed with easy hair.
It's naturally wavy and thick,
and it takes very little to maintain it.
I'm not a fru-fru kinda gal.
It doesn't get blown-dry, hot ironed or moussed.
In fact, it's never even been dyed, believe it or not.
One problem that's always plagued me has been tangles.
Because of its thickness, 
it would be very challenging to comb through it after shampooing.
And I've never been able to use a comb on it when it's dry.
Well, a recent discovery changed all of that.
This recipe has made my hair easier to manage
so that my routine is even more streamlined.


Two readily-available ingredients, and less than 3 minutes,
and you'll be on your way to taming your tresses.
Simply add 1 T apple cider vinegar per 1 C of water.
Some recipes call for distilled or filtered water,
but I figure that the final rinse is with plain ole' H2O,
so why make it complicated?


The plastic spray bottle stays right in the shower.
It's best if shaken not stirred right before use.
Spritz the solution on your hair, including ends,
and let sit for a minute or so while you finish washing up.
Then just rinse everything, from head to toes.


Keeping the recipe right on the bottle
means that I am always ready to refill as needed!
The bonus is that it costs just pennies to keep yourself looking good!
Another thing to cross off the shopping list!


My locks have never been more manageable.
Whenever I wash  and rinse my hair, I comb it out, braid it,
and take the braids out the next morning.
(Can I tell you how thrilling it was 
when my hair was finally long enough to braid?)
***SQUEAL!***
Couldn't be easier, 
and I now look forward to washing my hair
because I know it will be tangle-free.

I hope you'll give it a go and let me know whatcha think!

Thursday, July 2, 2015

One Simple Thing-Cleaning Make-Up Brushes


I'm about as low-maintenance a gal as you'll find.
However, I do wear make-up when we run errands about twice a week or on special occasions.
It's important to keep brushes clean.
This not only extends the life of the brush,
but it's better for your skin.

Here's a simple and quick way to get those brushes clean:

1.  Place 1 teaspoon of coconut oil in a ramekin or shallow bowl.
2.  Add one squirt of castille or other gentle soap.
3.  Wet brush with tap water.
4.  Dip brush into soap mixture and rub in a circular motion on your palm.
5.  Rinse until water runs clear.
6.  Repeat if necessary.

After sufficiently cleaning your brushes,
lay them out flat to air dry on a towel.

Depending on how often you use them,
they may need to be cleaned weekly or only once a month.
This method ensures brushes stay clean
and helps keep skin clear.


One Simple Thing

You might enjoy these "One Simple Thing" Posts:
Watermelon Pops 
Bottle Marker 
Think Outside the Box


Our Simple Homestead Blog Hop


simple saturdays3 300


Thursday, March 28, 2013

Out of Sorts...

Not feeling up to snuff today.
Fortunately, Friday's post is all ready to go.
Be back real soon.


I


Enjoy your Thursday, y'all!

Thursday, December 13, 2012

Homemade Lotion

While on vacation recently,
Sister shared with me a container of shea butter
she found online.
For the last couple of months,
my hands have been painfully dry.
It was a good chance to try mixing up a soothing salve.


Shea butter and coconut oil are both well-known
as skin softeners.


About 1/2 cup of shea butter was placed in a small bowl.


Mashing it with a fork broke it down quite a bit.


In just a few minutes it looked like this.
Looks like butt-uh.


3 soup spoonfuls of coconut oil were mixed in.


Just a few drops of an essential oil completed the emulsion.


This simple recipe has helped my hands so much.
Of course it can be used all over.
Wouldn't it make a lovely holiday gift?
If you have a mixer or blender,
you can make it super smooth.
A few lumps don't bother me, I'm just happy that it works.
Thanks, Sister,
for always sharing and helping foster my creativity.
Enjoy!


Homesteader-Hop-Banner


Monday, July 16, 2012

Homemade Oil Cleanser

I haven't washed my face in over a week.


Well, washed in the traditional sense,
with soap and water.
I'd been reading about a different way to cleanse using oil.
Yeah, oil.
I've always had T-zone skin,
normal on the cheeks, but a bit oily across the forehead,
down the nose and on the chin.
My skin has never been problem-free either.
I have noticed an improvement in my skin
since I stopped eating white sugar.


Now that I'm in my 50's,
it just doesn't sit right with me that I have to deal with
wrinkles and blemishes at the same time.
What's a gal to do?


photo source

So, the idea is to cleanse the skin with a combination of oils.
I know it doesn't make sense,
but it really works!
My skin does not feel greasy or oily in the least.
I've had no trouble with breakouts.
Another lesson learned about how to do something better
by questioning traditional methods.
This homesteading journey is such a blessing.

Oil Cleanser
(normal skin type)
20 % castor oil
80% olive oil
Pour in a bottle and shake before use.
Wet face with warm water.
Put a dime-sized portion in your palm
and massage into your face/neck for at least a minute.
Soak a washcloth with hot water
and place on face until washcloth cools.
Repeat as needed until all areas are rinsed.
Use once daily (I do this every night).

In the morning, I simply rinse my face
with warm water.
It makes sense to me that daily use of soaps,
even mild ones, could strip away
natural oils that the body produces.
And I love being able to use what I always have on hand
for another purpose.
Let me know if you give it a go!


You can find out more about this method

here.


Thursday, April 21, 2011

Homemade Hair Conditioner

One of my goals this year is to
focus on being more self-reliant. 
Rather than buying personal care items,
I am striving to make my own.
The bonus is that it's good for the earth...

I found this recipe in the book,
Homesteading Edited by Abigail R. Gehring
You can find a recent book review here:


Homemade Hair Conditioner
1 C olive oil
1 t lemon juice
1 t cider vinegar
2 t honey
6-10 drops essential oils, if desired

Whisk all ingredients together or blend in processor. 
Store in airtight container.

I used this the day after I made it. 
Keep in mind that this is used before you shampoo. 
It's best to keep it on your hair for at least 10 minutes,
but I imagine 20-30 wouldn't hurt. 
For best results, wash hair twice
to be sure you remove all the oil.

This really made my usually dry hair feel super soft.
I plan to use it once a week as a leave-in conditioner.
It's wonderful to be able to make a product
that's so often used,
with ingredients that are readily at hand.
And no, you don't end up smelling like a salad...


*Update-I've been using this (almost) once a week
for a month now, and I can't stop touching my hair!
It's sooooooooooooo soft!  Whodathunkit?*