Showing posts with label down home blog hop. Show all posts

Friday, December 12, 2014

Frigid Friday (or "Fridged" Friday)


We've been enjoying temps in the 40's each morning,
with highs during the day in the 60's and 70's.
Perfect weather this time of year, if you ask me.
We wanted to bring a little of the chill inside.


This should probably be a "Thrifty Thursday" post,
but I'm a day behind.
I spotted some of these cute refrigerator makeovers while internet cruising
and we just had to participate.

So easy, yet it adds so much punch to our holiday decorations.
We'll be doing this every year!


 We have a white fridge, but since it's a side-by-side, 
decorating the front didn't work so well.
We simply moved our artwork to the side facing the rest of the kitchen.


 I made up a bow using some holiday ribbon,
cut out a few stars with a paper punch
and free-handed a few coals for eyes, the mouth, the hat,
and the all-important organic paper carrot for the nose!
The fun thing is to mix and match what you have to customize your snowperson!


A simple, cheery addition to the kitchen this holiday season.
Mix up a scratch batch of cocoa mix and have a toast!
Enjoy!


simple saturdays


Homestead Barn Hop


dare to deck the halls


Friday, August 22, 2014

Planting Pineapple


One of the easiest fruits to grow here in Central Florida
is pineapple.
The flavor of these homegrown beauties is unlike anything
you'll find in a can at the grocery store.
I've grown these myself, so you know it has to be easy.


This is a pineapple patch at Faye & Lynn's homestead.
They use the metal trash cans to cover the plant when it gets near pickin' time,
so that the raccoons don't get to it first.


Here is Lynn's method of assuring a healthy, productive plant.
The top of the pineapple is saved.
It can be dried for a couple of days in the shade outside,
but it's not necessary.


Lynn uses  needle nosed pliers to remove the bottom-most leaves
from the crown of the plant.
Gloves help protect hands from thorny leaves.


You can see the ones closest to the neck are the most dried out.


By just removing a small handful of leaves,
the pineapple has a better chance at becoming productive.


The small brown patch you see here is the beginning of roots.
By eliminating the outer leaves, the roots have more opportunity to attach to the soil
and thus, start growing.


See how many more roots there are now?
Lynn whittles down until a small knob is formed.
That's what gets planted.
Pineapple plants like full sun and are surprisingly drought-tolerant.
Give them space, 
because many times, they will quadruple in size.
They can also be grown in containers.


This tropical wonder loves the heat!
The plant produces one fruit at a time,
but will continue to produce,
treating the gardener to sweet, juicy pineapple over and over.


When the base of the fruit turns from green to mostly brownish-orange,
it's ready to harvest.
Simply twist at the base and it will come right off.
You're set to enjoy one of the most delectable and refreshing tidbits
that ever came across your plate.
Enjoy!


barnhopimage


http://www.anoregoncottage.com/wp-content/uploads/2013/03/jtgpfinal.png


Back to the Basics


Thursday, August 14, 2014

Making a Home for Pollinators


About 75% of all flowering plants rely on animal pollinators
and over 200,000 species of animals act as pollinators.
Bats, bees, butterflies, and hummingbirds are some of the creatures who perform this amazing feat.


Without pollinators, many of our food crops would perish.
This includes blueberries, melons, coffee, almonds,
and one I don't wanna live without, chocolate.


Pollinators are fascinating to observe.
I encourage you to stroll your property
 or any nearby natural area,
and enjoy discovering how many pollinators share the space.


Ensuring that these helpful critters have ample nectar sources is important.
One way to accomplish this is to use plants that flower at various times of the year.
Using natives is the best option.


Avoiding pesticides is paramount to the health and well-being of pollinators.
If they're not healthy, they won't survive,
and we will diminish the array of delicious food choices we have to relish.


Providing a safe haven for pollinators allows them to go about their work
as well as allowing them a space to reproduce.
This ensures future generations of these magical creatures,
which in turn, benefits us all.


One thing that we do is host caterpillars.
We furnish nectar and host plants for the monarch, Gulf Fritillary
and Eastern Black Swallowtail butterflies.
It's not only easy to do,
but will foster a sense of appreciation for this place we call home.
We also share this experience with others,
by giving away the caterpillars on Craig's List,
so that others can allow the cycle to continue in their own gardens.


Lest you be worried that your yard will become unsafe due to all the stinging insects about,
rest assured that most bees will not sting.
Once they sting, they die,
and as August Boatwright said in the movie
"The Secret Life of Bees",

"No life-lovin' bee wants to sting you".
I find wasps to be a bit more aggressive,
but I offer them a wide berth.
There is plentiful room for us all to share.


I hope you are savoring the last remnants of summer
and unearthing the wonders of our world
right in your own backyard.
 For more information, read this.

More posts on hosting butterflies: 


Back to the Basics


http://www.anoregoncottage.com/wp-content/uploads/2013/03/jtgpfinal.png

SchneiderPeeps - Simple Lives Thursdays Link Up

barnhopimage


Simple Saturdays Blog Hop

Thursday, August 7, 2014

Thrifty Thursday-Hose Repair


Although our Farm School posts have ended,
I'm still going to The Hill every weekend to work with Faye & Lynn
on their 4,000+ square foot container garden.
There is still so much to learn.
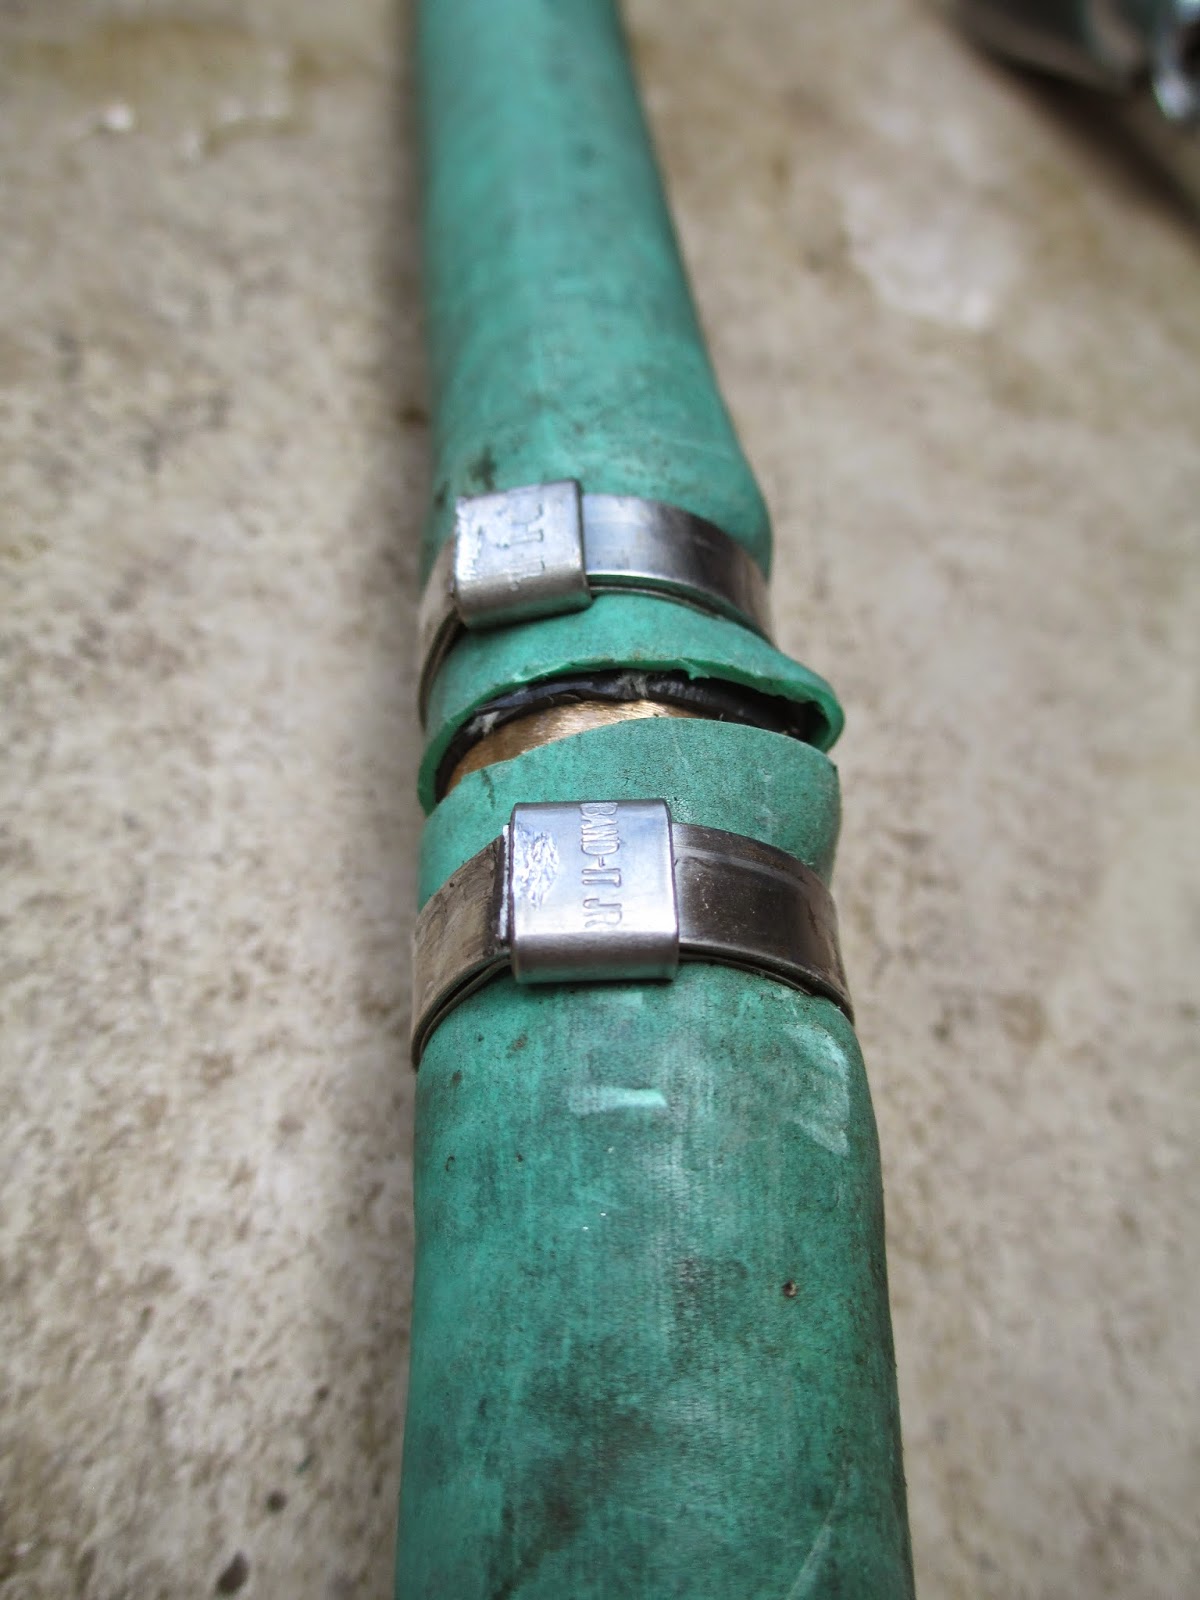
Lynn showed me his way of repairing broken hoses.


Squirrels have been busy gnawing away on this one.


This is what is customarily used to repair hoses.
The clamps that usually come in the kit are bulky and can rust.


As usual, Lynn has found a way to create a longer lasting, more effective solution.
Like us, he tends to live outside of the box,
so coming up with these remedies is just a matter of time.
With just a few tools, you can permanently repair any garden hose.


The key is using this tool
which can be found in the automotive section.
Lynn prefers these clamps because they are less likely to snag on things,
won't rust and fix the problem forever.


The damaged section of hose is cut away.
It can still be used for other purposes,
like being used as a hose guard around planters,
or cushioning a metal bucket handle.


The brass fitting is inserted into one of the severed ends.
So far, so good.


The clamps are placed on either side of the connector.
These will form a tight seal and give the hose years of new life.


The banding tool is a cumbersome rascal.
The loose end of the clamp (I call it the tail end),
is fed through the slot in the tool.
A ratchet is placed on the opposite side over the nut.
The tail end encircles the slotted side.


The turning of the socket wrench tightens the clamp
until it's snug as a bug.
Then, by moving the banding tool up and down,
the end of the metal band is snapped off.


It takes some patience and a lot of coordination.  
A couple of extra hands helps,
but you'll end up with a fantastic seal that will never budge.


You may never have to replace a hose again!


It just goes to show,
there's always a way to improve on the way things are done.
And if it saves you money at the same time,
it's a win-win.


Homesteader-Hop-Banner

circa 2011 The ORIGINAL Farmgirl Friday Blog Hop


Tuesday Garden Party Co-Hosts


barnhopimage